Friday, August 17, 2012

Color Me Scrappy Challenge #10

The color combo for this challenge is totally awesome! Love it! Bright,Cheeful and everything I like!

And here is the layout I created using these fun colors!


We took these pictures in Central Park, NY. Love them! The green just pops on this paper! I cut the brackets and the Camera on the Cameo. I used Heidi Swapp neon washi to just add little pinch of bright color here and there. It actually comes with a warning 'Use Sparingly'!! LOL


I filled in all the grey tangerines with a light blue marker to give it a little something. I like this paper collection a lot. So happy happy. I layered  the stickers for the center.


I used Amy Tan's whitewash muse chipboard thickers for the word 'snapshots' and used her camera file from the Silhouette online store to cut out the camera. I like cameras!!


I thought I had too much space for journaling, I was wrong. I can journal much more! I can write and write and write. I love this pic of 3 of us, although Anurag is looking away knowingly. That is his new thing, not to look at the camera. I hope it changes soon:D I had the perfect pink vinyl thickers for title.

Hop on over to Color Me Scrappy blog to take a look at what the other designers came up with! Participate in this challenge to win a fab prize of 4 MME 6 by 6 paper pads! This challenge runs till August 31st. So there is a lot of time, have fun using these colors!

Supplies


Pattern Paper:  Recollections Amy Tan Sketchbook collection, Basic Grey
Embellishments: Amy Tan Sketchbook Collection, AC Thickers, Neon Washi
InkMemento  Pink
Glue: ATG 
Tools: Fiskars(Trimmer, Scissors), Silhouette Cameo
Pen: Memento Pink Marker and Light Blue Marker
Printer: Canon Pro 9000 Mark II


Friday, August 3, 2012

Silhouette Cameo Dust Cover

I saw the latest product by Silhouette, the dust cover for the Cameo. I thought why not make one. Found a pattern by MzDaisy. Thankyou for sharig the pattern:) I had leftover fabric from the dust cover I stitched for Pazzles and Big Shot. It wasn't too difficult. Took me about one hour. Anurag kept asking questions. I probably read a book or two in between! I really like my own personal dust cover( Much Cheaper!!). 


Sorry for the poor photo! I took it with my phone and no natural light. I made a fabric flower to give it a little pretty factor. For the pazzles, I had done a piping in the alternate fabric all around at the bottom. This time I was feeling lazy. LOL...that would have been easier considering my fingers are covered in fabri-tac from the flower! It ate my nail color! Super Sticky but good stuff!


I love the end result! Now, my lovely Cameo is not going to get dusty! I love how the rosette turned out! 

Well, I hope you will give this a try. It isn't too difficult ! And way more colorful ! I really wanted yellow cover but didn't want to cut the new fabric just for this. I do have a very cute yellow fabric I had bought to stitch a skirt...yes sometime in the future I will finish that project ;)

If you can't make one, let me know ! I will make you one for a little charge. It will support my paper addiction ;)

Thanks for visiting me and leaving comments! Have a good day!

Supplies

Dust Cover Pattern by Mz Daisy at Silhouette Plus Forum
Fabri-Tac for the Rosette


Thursday, August 2, 2012

CMS and Sketches in Thyme - Challenge #9

I am so excited to announce that Sketches in Thyme is doing a combined challenge with us over at Color Me Scrappy! I love Sketches in Thyme! Fabulous Sketches. I am so honored to be a Guest Designer on their blog! Get Ready!!

The color palette provided for this month is yummy! Check it out! I knew which photo's I was going to scrap the moment I saw this combo.


The sketch #86 provided by Sketches in Thyme is absolutely lovely. It is so versatile! I had no trouble with it. It was just so adaptable ! Perfect Sketch!


This is what I came up with! I did a mirror image of the sketch and made it into a two pager. You must already know I love two pagers! Well, Photo selection was easy. I chose the recent July 4th pics. The color combo made it super easy and fun !


I won the July ribbon kit from Ribbon Carousel. Check them out! They have some great sale and super cute stuff! It was perfect for my layout. I had so much fun weaving the ribbon. I love the red and blue with white stars on it! The red,white and blue twine added a little extra edge to the hidden journaling tag. I made flags with toothpicks and added some ribbon and rhinestone to it as well. 

I actually misspelled Philly. LOL. I did correct it later. And my husband couldn't stop laughing about the gatorade. He thought it was weird that I wrote gatorade in the middle of all that. Hey in my defense, it was too hot!! Equally important part of the day:) Couldn't have done without it!


I just got a Cameo!! I was wanting one forever! I love how everybody is cutting all intricate stuff on it. I am so thrilled!!!! I used Silhouette Cameo to cut out 'happy'. It is a free font. I do have Pazzles too btw. Crazy isn't it?? What am I going to do with two, I still don't have an answer. I used Mister Huey's misting spray and some rhinestones for embellishing. I am not very good with sprays yet. I need to watch some You Tube videos and learn. I am loving those rhinestones! I wish I had picked up a ton of them at CKC. I was not sure if I am going to like it. But, now I do!! I love it!


Well, I hope you like my layout! I had an awesome time doing this one. Everything just fit right starting from the color combo, sketch, photos and papers!

I hope you'll stop by the Color Me Scrappy blog and Sketches in Thyme to take a look at what the rest of the Design Team made using these Colors and Sketch as inspiration! This challenge is open until August 15th, 2012. I hope you will join in on the fun to win the awesome stacks by MME!! LOL I wish I could participate ;-)


 Thanks for visiting me and leaving comments! I appreciate it! 

Supplies

Cardstock: Bazzill Off-White Cardstock, Bazzill Navy Blue Cardstock and AC pastel green cardstock.

Pattern Paper: American Made by MME
Embellishments: American Made by MME collection embellies, Rhinestones, Mister Huey's Spray, Ribbon, Toothpicks
Ink: Distress Ink-Barn Red
Glue: ATG and Foam Dots by Glue Arts
Tools: Fiskars(Trimmer, Scissors), Silhouette Cameo, Fiskars Upper Crest Border Punch and Fiskars Leave it to Weaver Border Punch (love fiskars)
Pen: AC black precision pen, Uniball White Signo Pen

Printer: Canon Pro 9000 Mark II


Friday, July 20, 2012

Color Me Scrappy Challenge #8

Oops I am so late in posting this! I thought I had it scheduled it, but I didn't! So this month we had a pretty cool color combo to work with. The colors worked perfect with the photos I chose!


This is what I came up with! It was SO MUCH FUN to make this layout! I am totally into lots of photos on a layout mode right now! This layout is based  on a sketch by Allison Davis, I changed the orientation and embellishments placement and title space etc to fit my liking!

I painted the bee-hive background with bubble wrap! It was so cool! I loved the effect. I printed the bees from the internet and cut them out with scissors and used a black marker to make the trail. I had so much journaling to do , that I ended up making an envelope to fit my journaling! Anurag was truly buzzing like a bee at the Please Touch museum in Philli. 

I hope you liked what I did! I hope you'll stop by the Color Me Scrappy blog and take a look at what the rest of the Design Team made using these colors as inspiration! The challenge is open until July 31st, 2012. I hope you will join in on the fun! Thanks for visiting me and leaving comments! I appreciate it! 

Monday, July 2, 2012

Color Me Scrappy Challenge #7

I totally loved this month's color combo! It is so me!! Bright, Happy and Colorful! Look at it!

The moment I saw this color combination, I knew the collection I wanted to use with them! It is my favorite collection!! Amy Tan's Sketchbook! This is what I came up with!


I totally love this layout! It just makes me happy!  I used the negatives of the hexagon cut outs. I painted the negative spaces yellow to make them pop! I love the 5 by 7 photo! Loving my new printer!

I hope you liked what I did! I hope you'll stop by the Color Me Scrappy blog and take a look at what the rest of the Design Team made using these colors as inspiration! The challenge is open until July 15th, 2012. I hope you will join in on the fun! Thanks for visiting me and leaving comments! I appreciate it!


Supplies 


Cardstock: Bazzill White Cardstock

Pattern Paper: American Craft Amy Tan Sketchbook
Embellishments: Amy Tan Sketchbook collection embellies, Anchor Thread, Rhinestones, Mister Huey's Spray, Thickers, Remarks Alphas, Doodlebug Alphas,  Folk Art Yellow Acrylic Paint
InkMemento Black
Glue: ATG 
Tools: Fiskars(Trimmer, Scissors), Pazzles Inspiration( to cut hexagons)
Stamps: Pink Paislee prairee hill collection stamp
Pen: AC black precision pen

Printer: Canon Pro 9000 Mark II


Friday, June 15, 2012

Color Me Scrappy Challenge #6

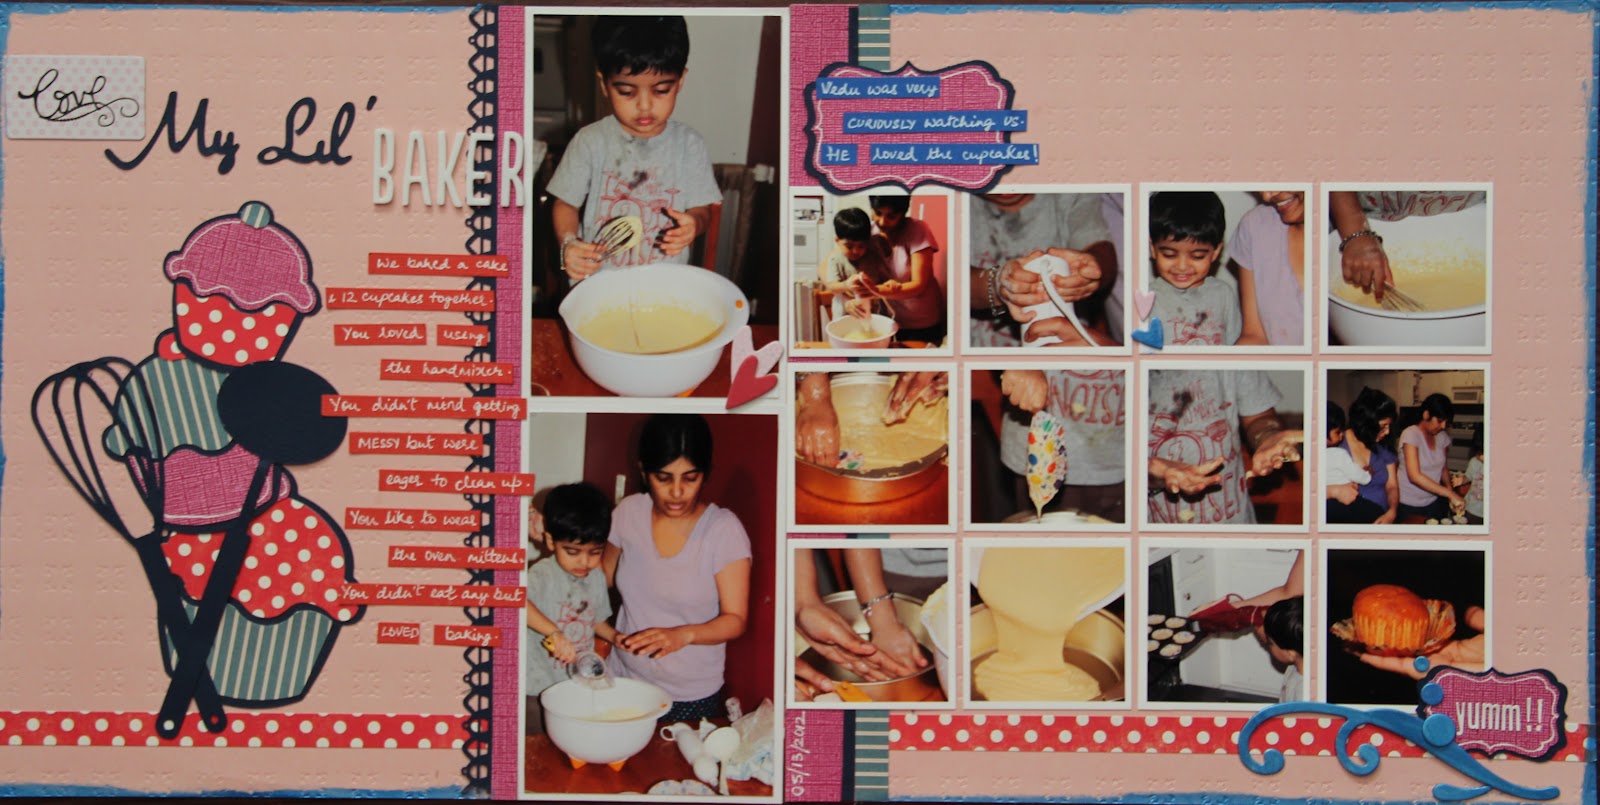
It is time for yet another challenge at Color Me Scrappy! The color palette given had two shades of pink. Pink is a very difficult color for me. Surprisingly I have very little pink in my stash, well not that surprising. I hardly ever buy pink. With two boys in the family, I rarely use pink and I never scrap myself. Hope project life changes that!


This challenge really made me go out of comfort zone. I pulled out whatever pinks I had and finally found something which worked with the colors. Here is what I came up with! 


You can click on the image to view it bigger. I used pazzles to cut the cupcakes and the frames. The title part in black was also cut on pazzles. The cupcake border was done using fiskars cupcake border punch. The white foam thickers are by Amy Tan. Some acrylic painted chipboards and it was done! This layout is based on a Allison Davis Sketch.

I hope you'll stop by the Color Me Scrappy blog and take a look at what the rest of the Design Team made using these colors as inspiration! The challenge is open until June 30th,2012. If you missed out on the first challenge this month, you can participate in this challenge and get your name in the random drawing for a chance to win a mystery bag full of scrappy goodness! I hope you will join in on the fun! Thanks for visiting me and leaving comments! I appreciate it!

Saturday, June 9, 2012

DIY Washi Tape

After testing my tapes for acid levels, I decided to make my own tape. These are obviously not original washi but these work just the same. They can be torn and used. They are semi-transparent just like washi. These are very thin as well.

I got two products to make them.

1) I got the Miracle tapes from Viva Las Vegas Store. Do check them out! They have a value pack of Miracle Tape in various sizes. That's what I got. It is double sided. It is acid free. They are good for variety of uses not just to make washi tape. I am very happy with the quality. I am sure to get more when my stock runs thin, which btw is really going to take some major washi making spree as each tape is 55yards long!! The price is very reasonable compared to other brands out there.

2) The other thing I got is the Lineco Acid-free tissue paper from Amazon. These are the kind which go behind art work in galleries. I got the white of course. Good quality. Of course, you can use tissue tape from dollar store or any other place, but then the whole point of making it acid-free is lost! You get a whole lot for 14$ on amazon. It will last you a long time.

Process

I stamped, colored, water colored and ended up with so many designs! I looked through my stamps and found some very nice ones! I made a quick photo tutorial for you to see!


Here are the results!


I had made one more batch of washi tapes before these ones, I thought I had taken a picture of them! I used them up on my project life pages.

 It is fun to stamp and make your own washi tape. I am loving the process! Hope you liked what I made. Come back and visit me later if you want to see them on my project life pages.

Thanks for visiting me today!


Friday, June 1, 2012

Challenge #5 at Color Me Scrappy!

It's time for a new challenge! The color palette this time is very neutral...something which I would have never picked on my own. It was challenging to begin with, but once I picked out the papers, the layout just flowed. Take a look at the colors!

This is what I whipped up ! I used my new chevron misting mask by SC,one of my
 favorite border punches by fiskars, indie chic dimensional stickers, ribbons and stamps from my stash. I had to make two stickers of my own to go with the indie chic collection, because they didnt have the number 5 and more 2-d banners. Coming to think of it, there is some DIY in the future in this category for me! I loved making my own. It wasn't too difficult and ofcourse it will be way cheaper to make your own!


I hope you'll stop by the Color Me Scrappy blog and take a look at what the rest of the Design Team made using these colors as inspiration! The challenge is open until June 15th, 2012And ofcourse, like always there is a wonderful prize! This time it is a mystery bag full of yummy goodies! I hope you will join in on the fun. Thanks for visiting me and leaving comments. I appreciate it!

Supplies 


Cardstock: American Craft Green Cardstock

Pattern Paper: DCWV dots,stripes and plaid
Embellishments: MME Indie Chic Dimensional stickers, Ribbon from my stash, AC Thickers and Sassafras alphas
InkMemento Cocoa Brown, Homemade Mist, Brown Distress Ink
Glue: ATG 
Tools: Fiskars(Trimmer, Scissors), SC Chevron Mask, Fiskars Upper Crest border punch
Stamps: Papersmooches Houndstooth border stamp
Pen: AC black precision pen


Wednesday, May 16, 2012

Challenge #4 at Color Me Scrappy!

I can't believe we are already at Challenge#4 !! This time the color palette is something which I almost never use! I never really use pinks in my layouts. This was a very nice change for me.

I made a single page layout of me and my sister and our kids. I cropped an old picture and printed all the photos as Polaroids. I cut out the dollie on Pazzles. I did the dot background using Crafter's workshop template. Some tearing,inking,chalking and voila this is what I ended up with! I love this layout! I gifted this to my sister. I feel very guilty for not including  my elder sister's pics. But, I didn't have any pictures of three of us together! Next time we meet, we need to take more pictures:)


I hope you'll stop by the Color Me Scrappy blog and take a look at what the rest of the Design Team made using these colors as inspiration! The challenge is open until May 31st, 2012. And ofcourse, like always there is a wonderful prize! Go and Check it out! I can't wait to see what you come up with! Thanks for visiting me and leaving comments! I appreciate it!

Sunday, May 6, 2012

Project Life: Week 17

Week 17 Project Life somehow took a lot of time! I am having tons of fun journaling. I love writing, I always end up writing a lot more! I hope it doesn't look crowded and my kids and grandkids in the future don't get bored of reading it! Well, we sure are having fun reading it. 
I did the regular 2 page spread but added a 6 by 12 insert and stuck photos and did journaling on both sides! It was tough to choose photos and but I think I got the whole week covered pretty good! I added a little more details this week. I added some washi tape, a little flag clip, and a hidden tab with facebook comments on Anurag's photo. I think I am going to do more of the facebook comments and status messages in the future, since it has become a big part of our lives! Sid is liking project life a lot. He loves reading it once I am done! I am sure we are going to enjoy it at the end of the year.

On one side of the 6 by 12, I have scrapped Anurag and Shilpa. She did the journaling and sent it to me by email. I printed it out on vellum and added it to the layout. LOL She said it was almost like exam! She has probably not written like this for a long time. She is a big part of Anurag's life and our's. I want him to remember all this. They make an awesome team.


On the other side of the 6 by 12, I have scrapped the movie we watched last saturday. I have added the ticket stubs and the food bill. LOL we ate a lot! In just one and half hours, we managed to have starters,drink,main course and a dessert! It was yummmy! I took photos of the ticket stubs and the bill and printed it out on a 6 by 4 photo sheet and cropped it. I have seen receipts fade over time, so this way I will always have it in my album!

Well, that's about what I did! I am looking forward to doing the last week's spread soon! I need to work on the thomas layout, DT layout and PL spread! So much to do! Thanks for visiting me today! Have a good week! I am linking this to Mom Creative for the first time!


Supplies 

Project Life Supplies: Becky Higgins Page Protectors
Journaling Cards: Sassafras Papers, other random papers(post coming soon)
Cardstock: Walmart Cardstock
Embellishments: Washi Tape, Martha Stewart Home Office Labels
Glue: ATG 
Tools: Fiskars(Trimmer, Scissors), Zutter Corner Rounder
Pen: AC black precision pen, Memento Rhubarb Stalk Marker